All exterior walls up

Hooray! Yesterday we had another very successful work party. With many hands on deck we raised the east gable wall, built the South 2nd floor wall, raised it, applied sheathing Zip tape to the areas between the floors, as well as finished a number of other jobs. Thank you to all who turned out: Eric, Craig, Brett, Whip, John, Gary, Darryl, Jason, and Terry. A special thanks to Adam, for leading us safely through the exterior wall raising process.

Unfortunately, we were all so productive (we didn’t even have lunch) there were no pictures of the work party in action.

View from Vernon St.

View from Vernon St.

Balloon framed West gable wall raised

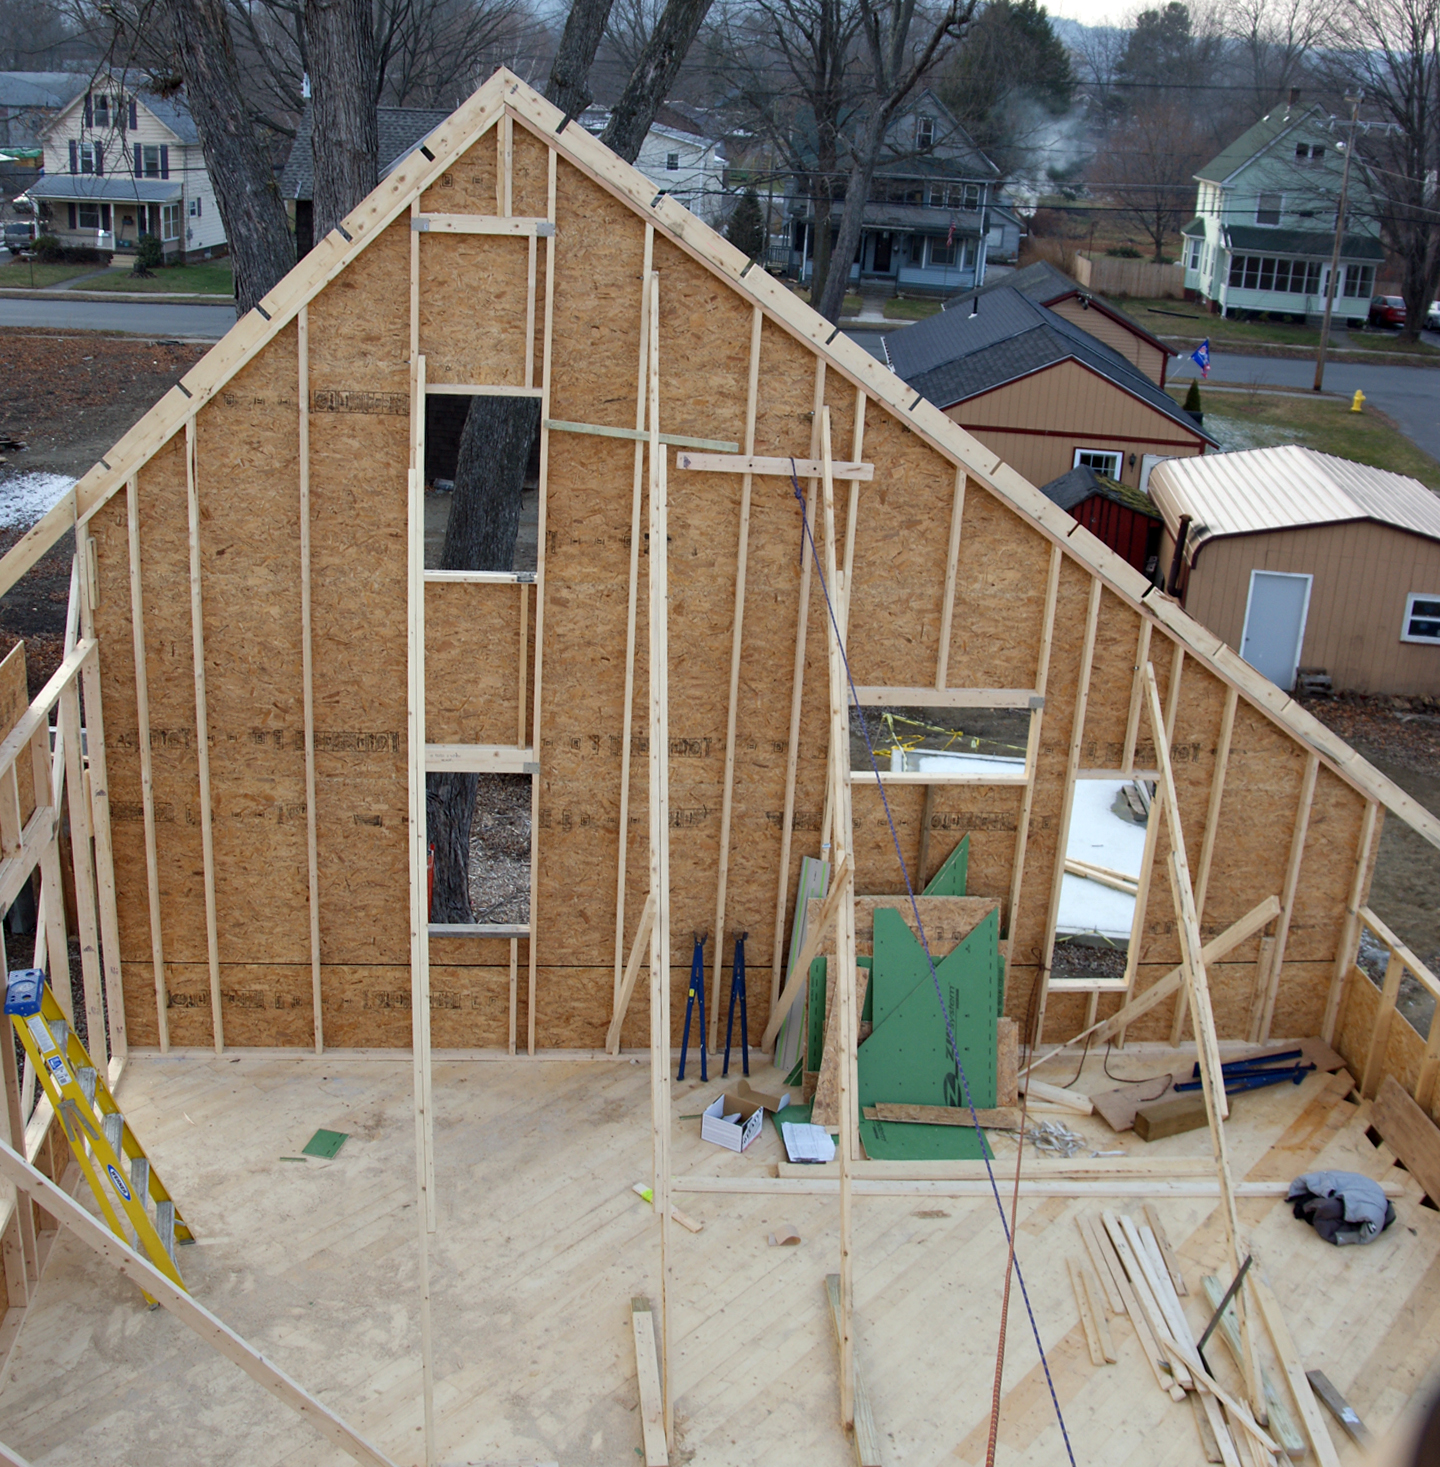
The second floor gable walls are balloon framed. There will be a ledger installed south of the transom window to catch the east-west joists. There will be a load bearing wall half way between the gables. Just visible is a bit of the north wall which is balloon framed from the first floor. More sheathing will be added and will be similarly notched to accommodate the rafter tails from the trusses. Also worth pointing out are the notches on the top of the gable wall top plate. This will be where the “lookouts” will be installed. We have a 2′ overhang on the gables of the house; the lookouts are the framing member that provides structural support for the overhang. The 4′ lookouts will attached to the first truss with structural screws.


View from the east peak

Another view from east peak. (Pic. by Adam)

View from the east peak looking straight down.

View from the east peak looking straight down. The house is just under 30′ tall at the peak. (Pic. by Adam)

Darryl, one of our neighbors, came to help later in the day.

Darryl, one of our neighbors, came to help later in the day.

Tomorrow we will be receiving the third floor building materials.

Success!

Despite the strong westerly wind, we raised the west gable second floor wall without any problems. In addition to myself, Adam, and Eric, we had eight volunteers. A big thanks to Craig, Brett, Jenny, Jason, Dylan, Whip, Gary and Terry! A special thanks to Adam for making sure everything went smoothly. Our next wall-raising party is scheduled for Saturday morning at 9:30 at which point our east gable second floor wall will be ready.

Group shot and wall

Wall-raising party tomorrow (12-8) / Double stud wall

Tomorrow at 9:30 we will have another wall-raising party. This one will be much briefer than the first as we will only be raising one wall. With the peak height of the gable walls at about 19′, there isn’t room enough to simultaneously assemble both. Earlier today we wrapped up the prep work including attaching what the braces to the underside of the wall–which meant jacking it up four feet.

My goal is to have another wall raising party on Friday for the east gable wall.

View from our neighbors house

View from our neighbor’s house. You can see the second floor west gable wall ready to be lifted.

Double stud wall

Over the course of the last couple of weeks, we have also been constructing the first floor interior part of the double stud wall. It is really good to see this going up because the 12.5″ of insulation that it affords is such an important feature of the home. The pair of windows on the left, like a few other pairs in the home, will have a common interior sill. This sacrifices insulation between the windows, but we will make up some of the loss by installing poly-isocyanurate (rigid foam) instead of cellulose.

Foundation insulation double stud wall

Making sure there is no thermal bridge where the foundation slab edge meets the stem wall is a tricky detail. I chose to run four inches vertical rigid insulation all the way up to the bottom of the double stud wall. The non-load baring interior stud wall was supposed to be over 50 % on the slab. However, the recycled insulation I acquired had a quarter inch of parging on it. Combine with inaccuracies in our DIY foundation and the wall hardly bared on the slab at all. This is a photo of our west wall which we moved to 13″ rather than the 12″ that I spec’ed. Here you can see how the double stud wall interacts with the foundation and slab. The interior stud wall bottom plate is held in place with Ramset nails. The rigid foam board is beat up so it sits below the top of the slab. We installed too high to ensure that when the slab was poured the concrete would be contained and avoiding the thermal bridge. Eventually I will use one part spray foam to seal the top of vertical insulation. Vapor and air infiltration might otherwise find their way up through the spaces between the layers of foam.


Second floor walls

Last week we were back to work and we got a lot done. The three second floor walls are pretty much all cut and the west gable wall is almost ready to be raised.

Eric on second floor

(Above) Eric is the latest member of the “team”. John D put me in touch with him. Eric is a landscaper and has dumped off several truck loads of leaves to get our compost pile started. Now that it is winter he has been making time to help out with construction as well. Coincidentally, he also built his own house without having previous experience! Eric’s help couldn’t have come at a better time. Thom and John S. have both finally found jobs (yay!) and John D has moved to Florida. In this picture you can see the diagonal floor T&G spruce boards that will be our finish floor. Also, in the lower right hand corner is the west gable wall ready to be assembled.

Work area

The south side of the house where most of the wall cutting has been occuring. You can see the East gable wall pile in the lower right corner of the picture.

Spartan cutting a 22 foot board

We were able to cut the 22' long top plates for the north side of the gable walls out of one of the 25' long concrete form boards. Cutting such a long board made me somewhat nervous. No room for error here; all of the other 25 footers had been cut into smaller pieces.

Waiting again

We finished putting on the second floor floor (pictures soon), however, we are held up by the engineer who has not yet done the analysis for the second floor framing. Hopefully we can resume building up right after the holiday.

Over the weekend Devin, Alexis and I began installing some of the first floor double wall system (pictures soon). It is nice to finally see the double wall coming into existence since it is such an important characteristic of the energy efficiency of the home.

Second floor joists

11-12-2010

A couple of days ago we put up the interior load bearing wall. Today, we finished putting up joists and blocking, and we are now ready to start putting down the flooring. For the second floor floor I decided to go with tongue and groove 2×6 spruce boards on a diagonal. The boards will be more time-consuming install and costly than a sheet good like OSB or plywood, but it means we won’t need to put down a hard wood floor at $3-5/S.F. Also, sheet goods, especially OSB, has a lot of glue in it, which I would like to avoid putting in our living space.

Joists

Adam

Adam

Spartan working on putting in blocking. Photo by Hannah.

Spartan working on putting in blocking. Photo by Hannah.

Spartan framed by the joists. Picture by Hannah.

Spartan framed by the joists. Picture by Hannah.

Boom truck

Tongue and groove 2x6 spruce being lifted to the second floor. The machine worked by radio allowing the operator to control the crane form the second floor.

Tongue and groove 2x6 spruce being lifted to the second floor. The machine worked by radio allowing the operator to control the crane form the second floor.

Tongue and groove 2x6 spruce

We have “Inside”

A huge step forward was taken over the weekend. We raised the first floor exterior-exterior walls (Exterior twice since it is a double wall). After spending Thursday trying to figure out how we would raise the 1300 lb north wall, with Hannah’s encouragement, I decided to have a work party. The alternative was to drive 3 hours into Vermont to retrieve a friend of a friend’s wall jacks.

And did we have a party. I am incredibly grateful to:
Adam, Devin, Thom, John S, Guy, Craig, Terry, Brad, Jan, and Josiah for helping construct and raise the walls.
A big thank you to my parents, Aniko and Ray, my wife Hannah, and Alexis for providing food and drink for us.

By the end of Saturday we got the north wall and east walls up and the west wall built. There was some difficulty with truing the north wall and laying out the locations for all four walls on the foundation, but, otherwise, things went smoothly.

Thom working on the frame for the North wall. A delivery of lumber in the background. - picture by Thom and Beth

Thom working on the frame for the North wall. A delivery of lumber in the background. - picture by Thom and Beth

Preparing to raise the north wall

Preparing to raise the north wall. Guy and his father Craig remove the anchor bolt extensions so the walls can be more easily set onto them. I decided to go with a single bottom plate to allow for more insulation in the wall.

Applying zip tape to the North wall

Josiah, Guy, Adam, Jan, and John help apply Zip Tape to the north wall while Spartan supervises.

Spartan and Adam discussing plans

Throughout the weekend I learned a tremendous amount about framing. There was a healthy discourse between myself and Adam with me questioning how and why things should be done a certain way.

Attaching the push-braces to the north wall with strap hinges

Attaching the push-braces to the north wall with strap hinges

The North wall propped up with concrete forms

The North wall propped up with concrete forms

Plumbing the north wall

Plumbing the north wall

Attaching the exterior bracing for the north wall

John, Adam, and Brad attach the exterior bracing for the north wall

Raising the East wall - picture by Thom and Beth

Raising the East wall. It went up without the door opening cut. - picture by Thom and Beth

Raising the East wall - picture by Thom and Beth

Raising the East wall - picture by Thom and Beth

Paper plans - picture by Thom and Beth

I put a lot of time making triple sure our plans were easy to read and accurate. Picture by Thom and Beth

About to raise the south wall

About to raise the south wall

Raising the south wall

Raising the south wall

Yee-hah!

Framing begins!

The first load of lumber arrived today, John and Spartan wasted no time in cutting and laying out the wall components. The first wall, the North wall was laid out and we assembled the framing, ready for siding with the ZIP system and to be stood up in place.

Here is the result of a few hours of work, can’t wait for more!

Building Materials Cost Comparison

I just finished a spreadsheet that compares building material costs for Western Massachusetts building supply outfits. R.K. Miles (Hatfield, MA), Cowl’s (Amherst, MA), and Leader Home Center (Greenfield, MA) are compared in the following PDF:

Cost Comparison Spreadsheet for RK Miles Leader and Cowls

Surprisingly, each outfit made numerous errors. All three left off materials that I requested. Leader and Cowl’s both had some quantity estimates that were much too low. In one case (Leader), added material that I had not requested (siding), which is why, in the non-normalized cost totals, Leader comes out $5000 more. In their defense the estimates are free and all three outfits informed me of their large workload.

The cheapest ended up being R.K. Miles with Leader being about 4.7% more expensive and Cowl’s being about 12.4% more expensive. I estimate that going with R.K. Miles over Leader would save about $700-$1000, however R.K. Miles is 30 Minutes away as compared to 15 for Leader. Considering my amateur building status I anticipate a need for a lot of quick runs to purchase small quantities of materials. The question is, would the discount savings for that type of purchase add up to $700-1000? Clearly it wouldn’t, as I would have to purchase at least $15000 worth of materials before I cleared $700 in savings.