Back draft dampers

In our post a couple of years ago on thermal imaging of our home, we noted that we were losing quite a bit of heat through our 2 bathroom fans. In fact, if one were to put one’s hand next to the fan (while off) you could feel cold air coming right on in. While surfing the web for a solution I found these retrofit back draft dampers:

Aldes 4" Retrofit Backdraft Damper

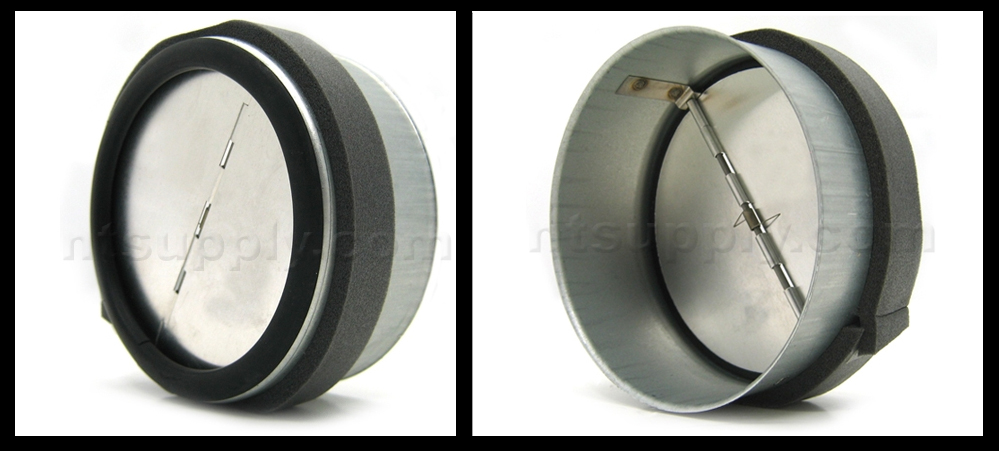
Aldes 4″ Retrofit Back-draft Damper

Installing one in the first floor bathroom fan was easy since the duct-work was exposed in the mechanical room. After putting one in the duct, I was, however, disappointed to still feel cold air coming through the damper, primarily through the hinge. I have seen some models where the hinge is taped, and I considered adding tape myself, but I was worried that the tape may not last/or actually cause problems. Instead, I put two dampers in the duct, which satisfactorily blocked the flow of cold air.

The second floor bathroom fan duct-work is permanently not accessible so I removed the fan from its box exposing the beginning of the duct. This was challenging only because the fan is 12′ up on a cathedral ceiling.

The downstairs bathroom went from being drafty and cool to being the warm interior space you would expect. The fans make a bit more noise as a result of the added air resistance, but I am not too worried. The Panasonic fans have variable speed motors in them and are designed to compensate for duct-work resistance.

I would recommend these dampers to anyone who is looking for easy improvements to their home’s energy efficiency. I bought mine from IAQ Source which seemed to have a better price than most. If you are building new, it would be cheaper to use an in-line backdraft damper like Fantech’s which also wouldn’t restrict the air-flow as much.

Advertisement

Data logging! Average energy for cooking.

So I feel incredibly nerdy right now because I am very excited about the information that we are gleaning from the data loggers in place around the house. One of them, a TED 5000 installed May 2013, has been monitoring the electrical consumption for our cooking, which we do a lot of. Our stove is a standard glass-top. We now have a pretty good sample of time (mid-April through mid-October) including “canning season”. In an effort to create a more detailed picture I isolated the canning period: September 1st through October 4th.

  • Average energy consumed per day (non-canning season): 1.27kW
  • Average energy consumed per day (canning season): 3.35kW
  • Extrapolating out we can expect to use 535 kW/year cooking and canning, and, based on last year’s total electricity usage, this would be 13% of it.
  • The cost for electricity for us has been around 18.5 cents/kW so we can expect to spend about $100 per year cooking.
  • We spent an estimated $13 on energy for canning (70kW)

The TED 5000 is also monitoring our air source heat pump, which has pretty much been off since May. We used it for a total of 12 days this summer 11 of which were in June and 1 in September. A total of 35.7 kW was consumed at a cost of $6.60. Eventually I will get around to calculating how many Btu’s the heat pump is putting in (or taking out of) our home. This requires knowing how efficient the heat pump is at various outdoor temperatures, and what the outdoor temperatures are on, I would imagine, at least an hourly basis.

Speaking of the outdoor temperature brings me to more exciting news: we just purchased two more temperature loggers! Last winter I moved our one logger around the home which left us with no perspective when viewing the data. Going forward, we will be able to compare outdoor temperature to first to second floor temperature data. The outdoor logger is out of the sun about 8′ from the west side of the house and 4′ off the ground. The second floor logger is in our master bedroom.

Now that we have data logged our cooking use, I will be switch over to monitoring our refrigerator. Stay tuned!