Clean-up, planning, and a game of crib

On Sunday Hannah and I spent the better part of the day cleaning up the site. Picked up trash. and sorted out the paper and recyclables. Stacked and tarped all of the lumber. Gathered together firewood that didn’t make it off the lot (up for grabs). We went through the scrap wood pile for donations to the art teacher at Hannah’s school. We finished the day with a game of cribbage in our living room. Hannah won again.

I have been spending a lot of time this past week learning about framing, modeling the framing in Archicad, and putting together a materials list. Sadly, I have decided that I will not be using local rough-sawn lumber. There is too much of a cost difference: 60 cents per board foot vs 45 cents per board foot for kiln dried planed. Even with the added embodied energy and work of shipping and processing the KD wood is way cheaper. Another example of backwards economics.


Five trash bags

The six trash bags here represent most of our trash so far.


Neat piles of lumber

Our stacked piles of lumber. Notice that the dirt pile is gone. In its place you can see there is a small pile of leaves; the beginnings of an effort to create soil.


Cribbage in our future living room

Its easy to get to know your neighbors when you don't have any walls to your house. Our neighbors across the street gave us a pumpkin, although we didn't risk leaving out on our virgin concrete slab.


Pouring the slabs

On Friday we finished the foundations by pouring the slabs! Another milestone.

When I say we, I mean the two guys who I hired: Rob and Barnaby. They did a great job and were a pleasure to work with. Unfortunately, the concrete trucks were late, and since the pour was already scheduled for the afternoon, Rob and Barnaby had to work into the dark. On Saturday Barnaby came back and we made two saw cuts into the house slab, dividing the house into quadrants. The cuts are called control joints, and they tell the concrete where to crack (the assumption is concrete always cracks).

The concrete truck is ready to start pouring.

The concrete truck is ready to start pouring.

Rob and Barnaby screed and trowel the slab.

Rob and Barnaby screed and trowel the slab.

Rob uses the bull float. Running it along the top brings the smaller particles and water to the surface giving it a smooth finish.

Rob uses the bull float. Running it along the top brings the smaller particles and water to the surface giving it a smooth finish.

Next steps; Pictures from previous weeks

We haven’t got a lot done this week due to the rainy weather. In some ways the rain is a good thing: it will help compact the sand underneath the slabs. Regardless, the week wasn’t without its accomplishments. On Monday the plumbing inspector signed off on the rough in plumbing and I back filled over it. On Wednesday I rented a concrete saw and cut a large notch out of the front of the garage stem wall for the garage door. I made the mistake of not taking care of this notch when we did the pour. I simply hadn’t considered it even in the planning stages. Also on Wednesday we put in a radon vent, brought over all of the rigid foam panels for the under the slabs, and we had most of the large dirt piles removed.

Yesterday and today I have been helping John S. out with renovating his bathroom–just a small part of my end of the work trade.

On Sunday we will borrow a small compactor and go over the area that will be under the slabs once more. The crushed stone above and around the plumbing hasn’t been compacted at all. After that we are ready to put down the foam insulation. I fully anticipate being done with the foundation work this upcoming week.

Stem wall evened out with Silpro Masco

The top of the stem wall was rather uneven, however, we corrected the matter using Silpro's Masco product. It looks much better now.

Silpro Masco mixing typos

Although Silpro's Masco worked well, they should probably get someone to proofread their packaging. Three and a half gallons would make a soup like consistency. On the other hand, I don't think quartz crystals would make it any better.

In order to get the height of the stem wall pour accurate we put a continuous strip of wood at the height of the pour and we trowelled to right underneath it. Along with nails (marked by orange spray paint) on the opposite side, it was very easy to get the height of the stem wall right.

In order to get the height of the stem wall pour accurate we put a continuous strip of wood at the height of the pour and we trowelled to right underneath it. Along with nails (marked by orange spray paint) on the opposite side, it was very easy to get the height of the stem wall right.

Hannah helped disassemble the batter boards and concrete forms. It was her first time wearing a tool belt.

Hannah helped disassemble the batter boards and concrete forms. It was her first time wearing a tool belt.

While Hannah and I disassembled the forms, our neighbors cat inspected the levelling job on the house stem wall.

While Hannah and I disassembled the forms, our neighbors cat inspected the levelling job on the house stem wall.

Thom runs the compactor while Peter helps distribute material. It was a hair-raising experience every time we got the bob cat in or out of the pit.

Thom runs the compactor while Peter helps distribute material. It was a hair-raising experience every time we got the bob cat in or out of the pit.

Back filling the garage went quickly

Back filling the garage went quickly

Sub-Slab Plumbing and Backfilling done

Since the last post a week and a half ago we have accomplished a tremendous amount. We poured the garage stem wall, re-leveled the top of the house stem wall, damp-proofed the house stem wall with UGL Drylok, and, of course, we back filled the entire lot! Unfortunately, it means that we just buried all of our hard work. Such is life.

Back filling was incredibly hectic and exciting. Thom convinced me that we could do it ourselves by renting a skid steer. Getting the skidsteer into the foundation pit proved to be challenging. With the help of Thom, John D. John S. and Peter M. (a friend of John S’s) We put in three consecutive 12-13 hour days of shoveling, hauling, moving, compacting, spreading compacting, and more shoveling. We ordered 10 loads of sand and two loads of crushed stone from Mackin. We also got a load of wood chips from Blue Sky–a friend of ours who is an arborist. The chips do a great job of keeping the dust down; plus we will need to start building the soil back up. On the morning of the third day of back filling, my friend Marc Kaufmann, who is doing the plumbing for the house, came with his friend Earl (who has done houses on slab before) came to do the rough in plumbing.

Building the ramp to get the skid steer into a foundation pit

In order to decrease our hand labor, we wanted to get the skid steer down into the foundation pit. This was easier said than done since we only had a a ramp that descended 5 feet in about 15 feet of run. The skidsteer did crash into the opposite wall on the first run down, damaging the foam board. The foundation itself was fine.

Building the ramp to get the skid steer into a foundation pit

back filling around one of the porch piers

John and John back filling around one of the porch piers

Skid steer in foundation pit

It was hair raising every time we ran the skid steer down into the pit. Also, I was afraid we would hit the concrete pier that stands in the middle of the pit. The pier will eventually be an interior load point for the house.

Back filling the garage

Back filling the garage went much more smoothly. There was no need to get the skid steer into the much smaller foundation.


The foundation pit completely back filled with sand

We compacted the sand back fill in lifts of about 7 inches. about 6″ of crushed stone will go on top of the sand, followed by our insulation and vapor barrier.

Town sewer connection in schedule 35 PVC

Originally my plumber told me to use schedule 35 PVC (green) for our sewer connection. However, after we finished he learned that it needed to be done using ABS (black). As you can see here we insulated the sewer line where it was just a couple of feet below the surface. On the right in the foreground you can see a cast iron pipe mortared into the existing town sewer connection.


working-on-sub-slab-rough-in-plumbing

Our plumber re-working the sewer drain connection. We used a Fernco to connect to the original clay town sewer lines.

Working on sub-slab rough in plumbing

Working on sub-slab rough in plumbing

Working on sub-slab rough in plumbing

Working on sub-slab rough in plumbing

Backfilling done

The site after back filling, 9-23-2010

Leveling the stemwall

Thom and I worked towards leveling the house stem wall today. Using the laser level we determined we had about an inch of variation with only about a half a dozen small high spots. After making little headway using an angle grinder with a grinding wheel on the high spots, we switched to using a hammer drill on hammer mode–which got the job done. The day was cut short by some empty storm clouds. Tomorrow we will apply the Masco cement to the top of the stem wall.

On Saturday, with Hannah’s help, I put up the last of the garage stem wall form panels. The garage stem wall pour is scheduled for Wednesday. Tomorrow we will also mark off the height of the stem wall on the forms as well as build a structure and trough to get the concrete into the far wall. The concrete truck is only able to reach half way.

Parging house foundation, garage stem wall forms

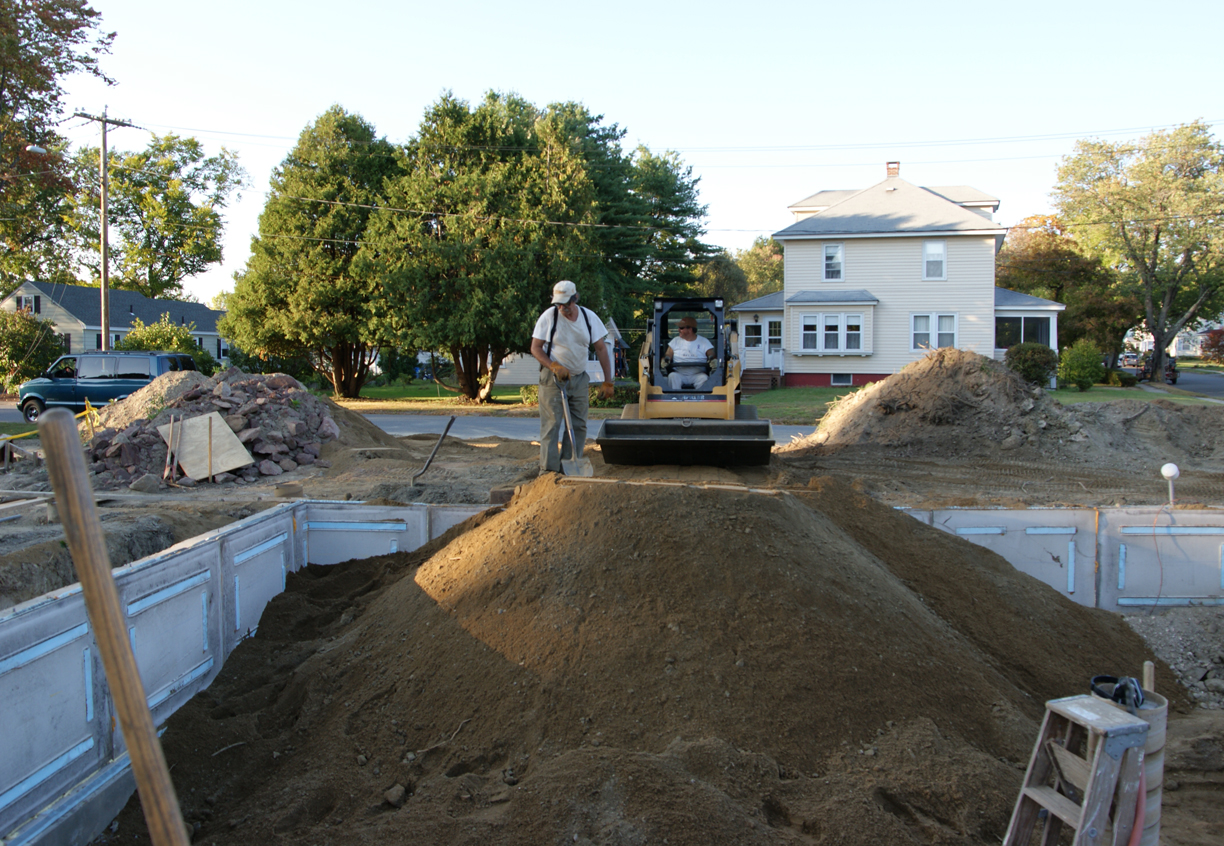
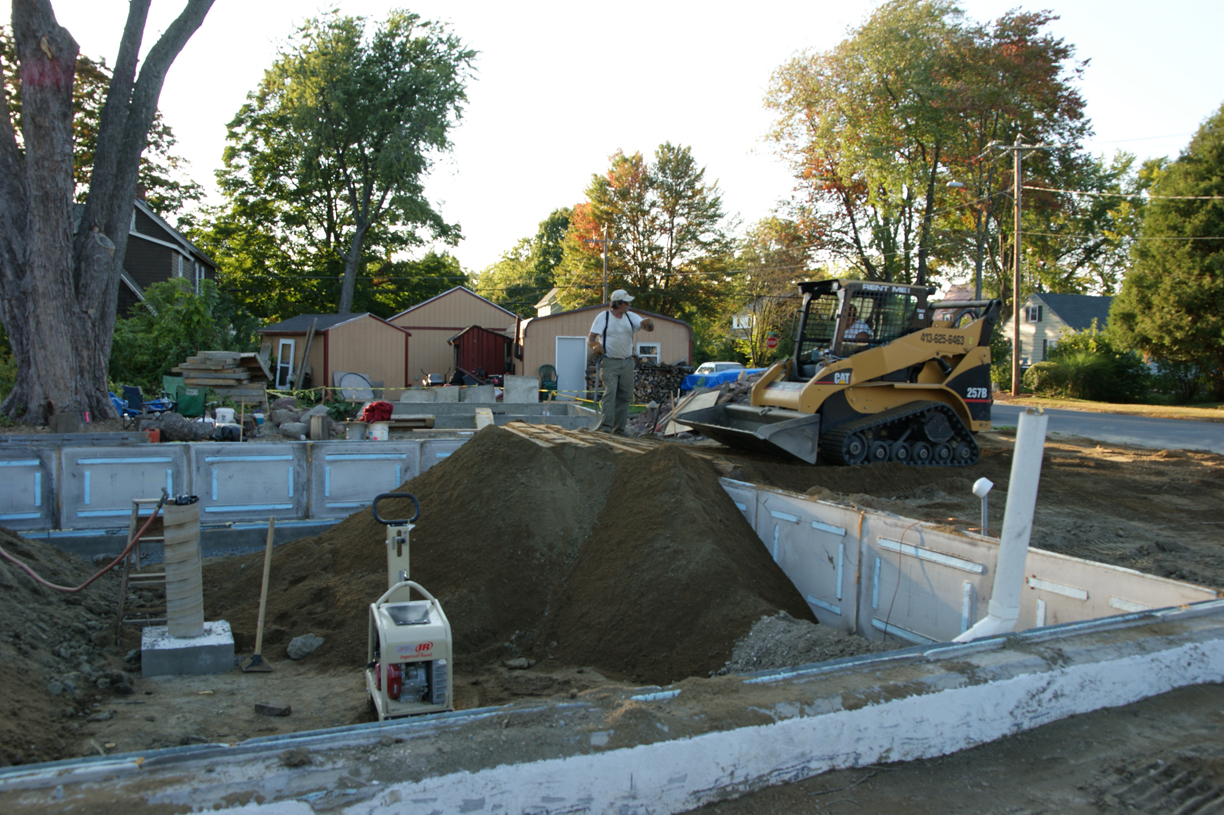
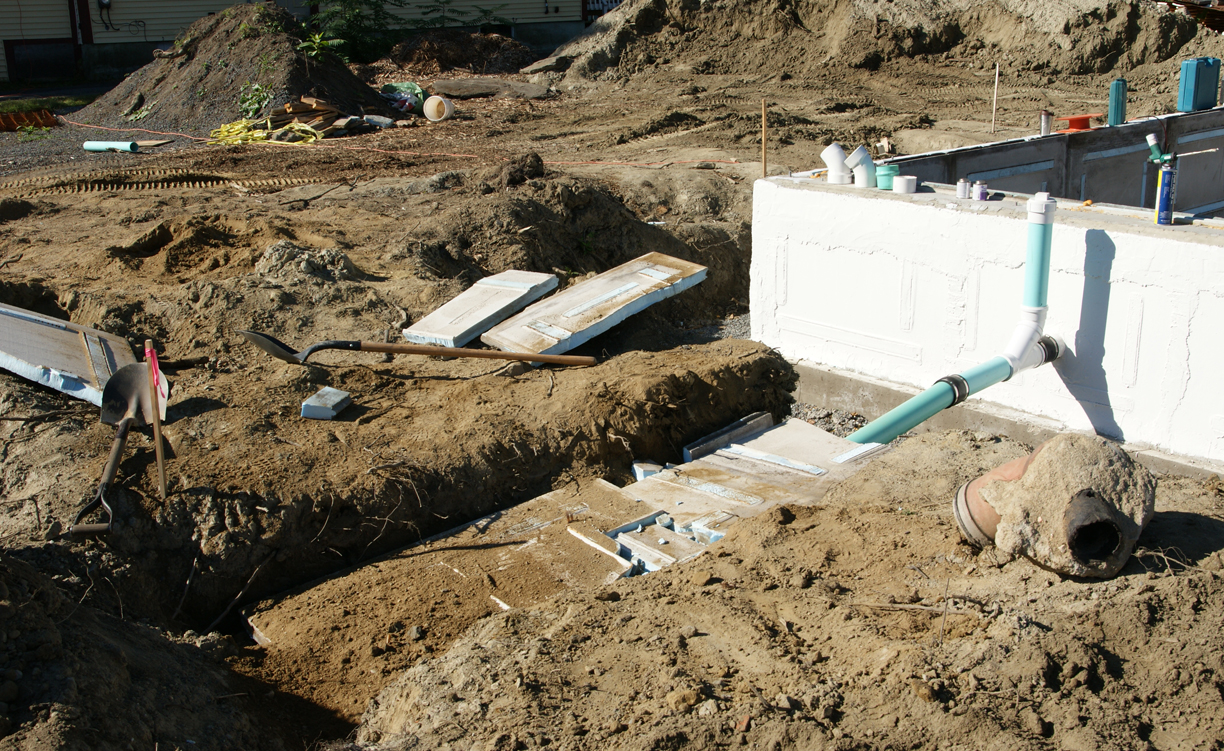
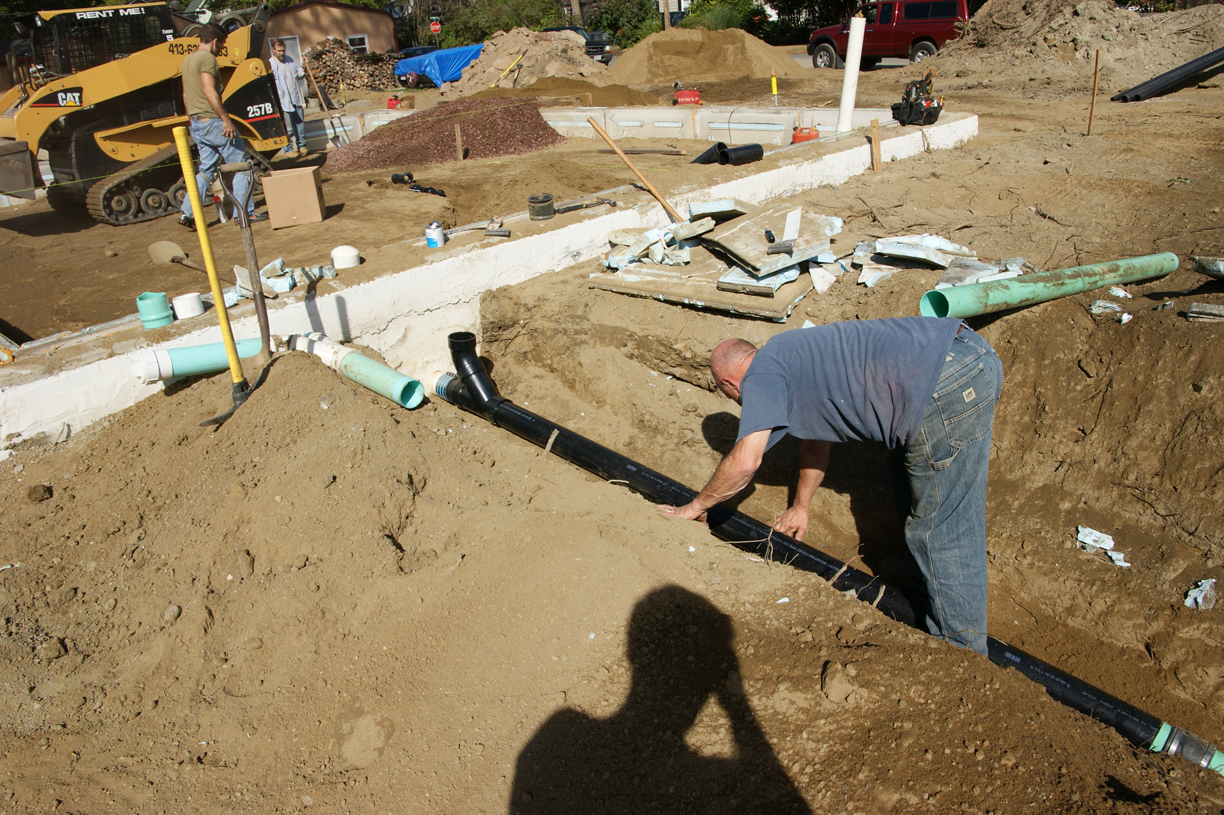
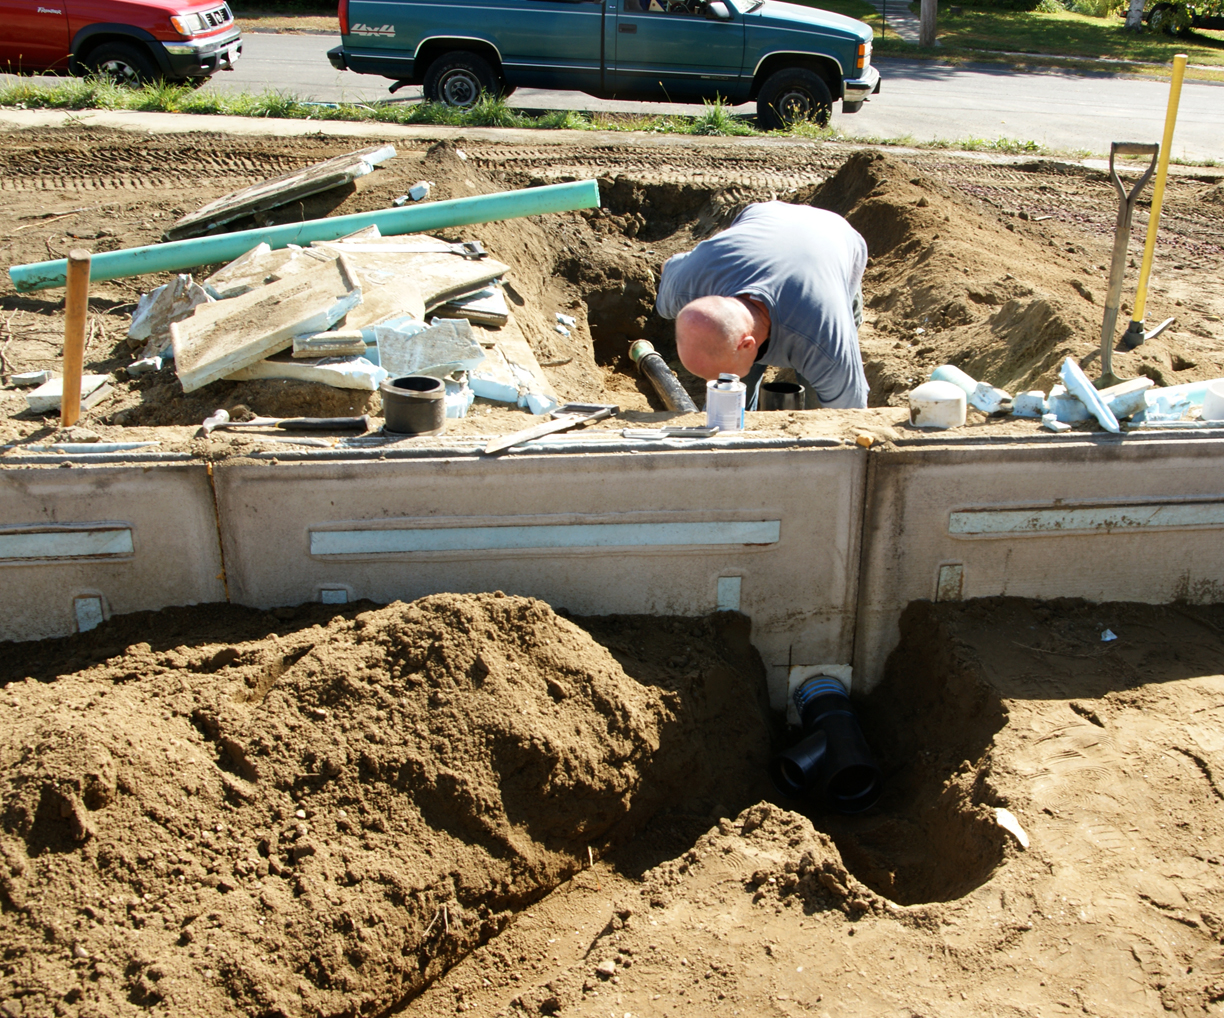
We are slowly but surely making progress towards back filling.

On Monday Devin, my good friend who I learned timber framing from, came to help parge (stucco) the exterior of the house foundation stem (frost) wall. Unfortunately, I wasn’t able to get the material we wanted in time: surface bond cement. Surface bond cement has chopped fiberglass in it and is water resistant; ordinarily it is used for parging the exterior surfaces of dry stack cinder block walls. Devin and I decided to make our own mix from what was available at Home Depot. We mixed masonry cement with fine and coarse sand, water and an acrylic bonding agent. It barely worked. The sand was much too gritty and it stuck to the trowel just as much as the rigid foam board concrete surface. That being said, we did make some good progress: we acid washed the foundation, applied lathe to the corners (so the parging would stick at this challenging location), and we parged about a sixth of what needed to be done.

On Tuesday I was able to get the appropriate parging material from Shanahan’s Construction Supply in Turner’s Falls. It wasn’t cheap though: $33/50# bag. Due to the cost, I decided we would only use the surface bond cement where we needed to: the seams and corners where the foam is exposed. By code, this serves as our termite barrier. If we had covered the entire surface, then the parging would act as the necessary damp/water-proofing surface, however, I decided it would be cheaper to apply UGL Drylok or a similar paintable compound. It was such a relief to apply the surface bond cement compared to the mix that Devin and I created. It went right on without any difficulty. Thom and I were able to finish the rest of the parging in time for lunch.

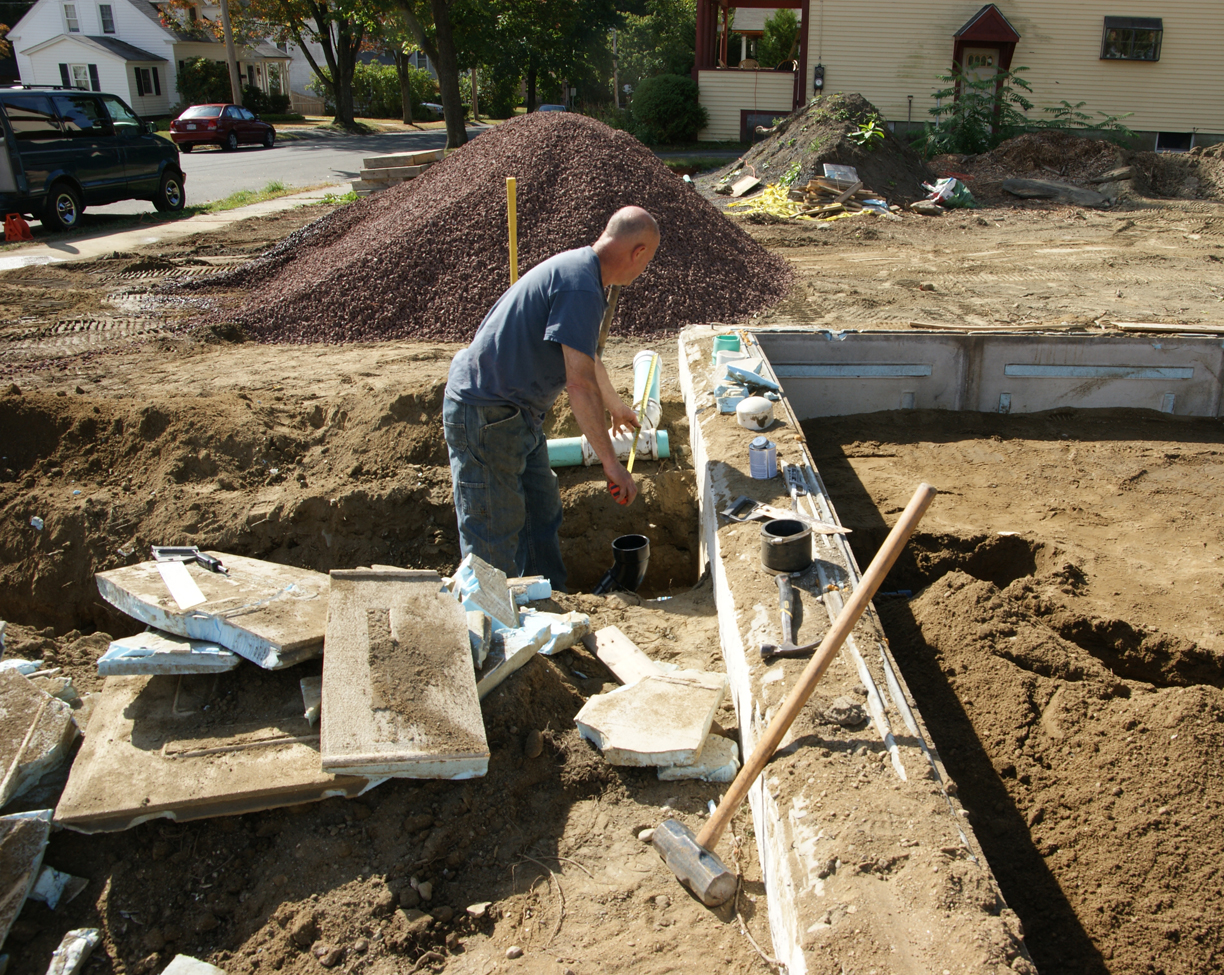
While I was at Shanahan’s I asked them if there was a product that would help level out the top of my stem wall, which has as much as an inch of height variation. They recommended Silpro Masco.

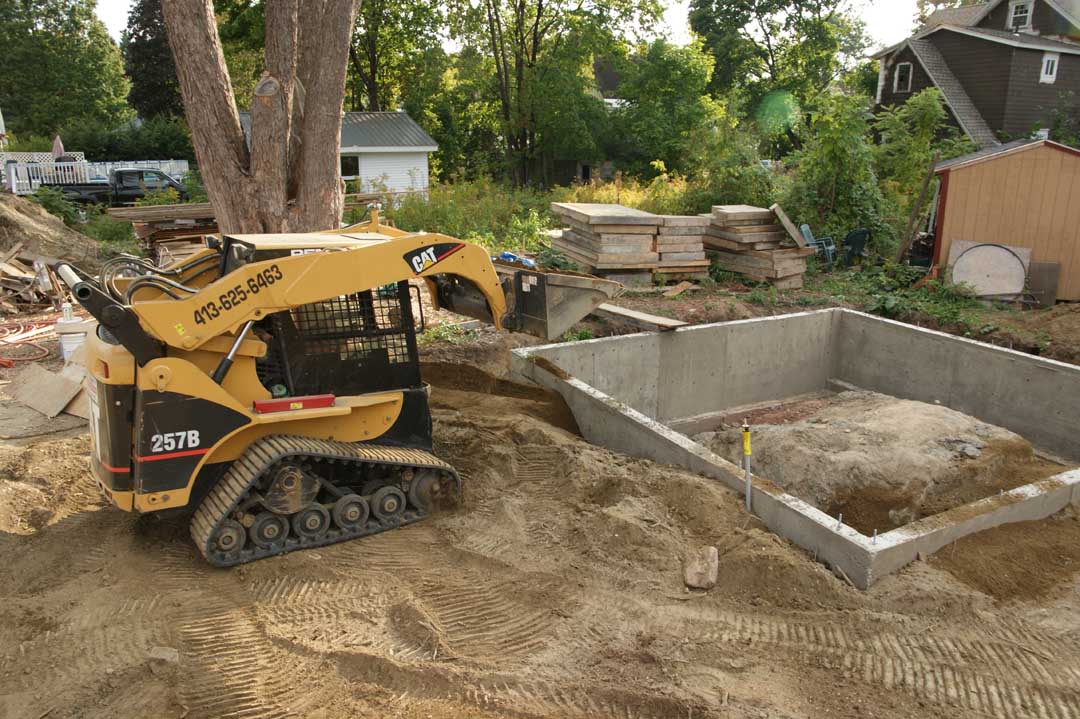
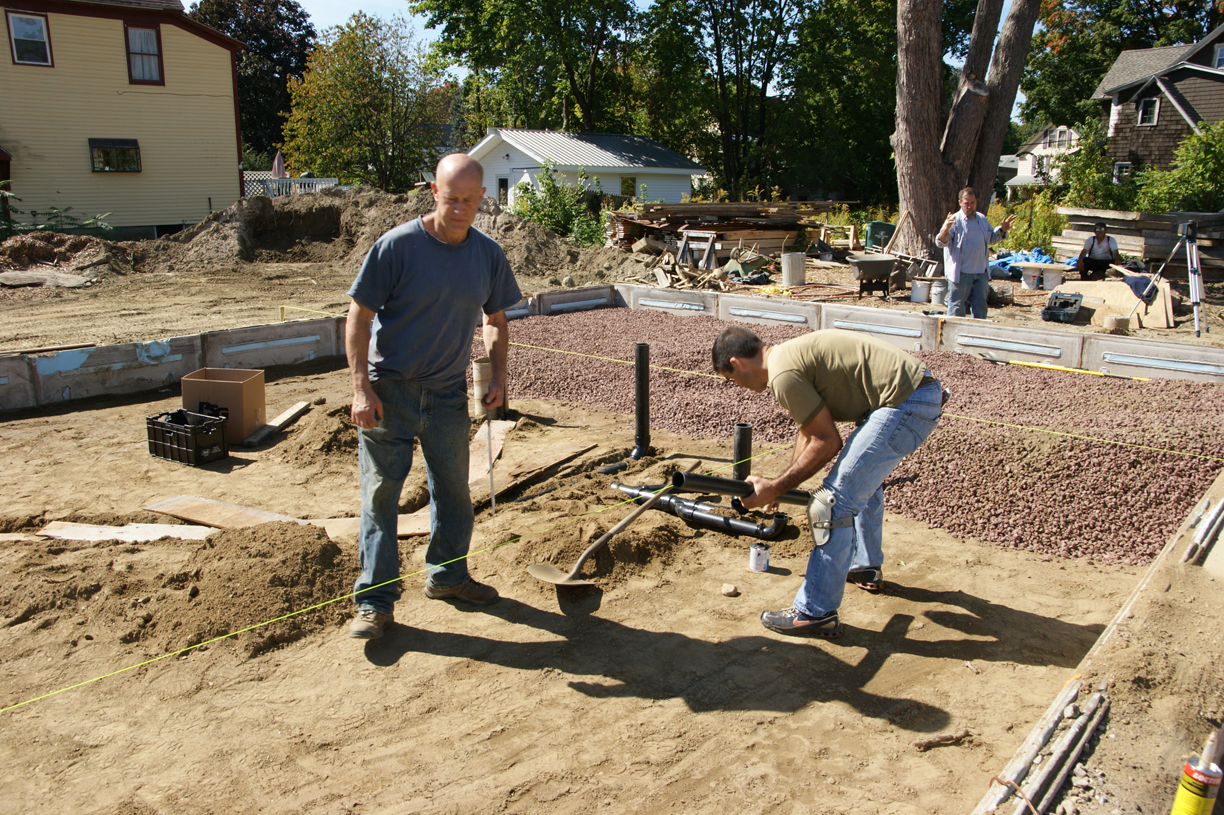
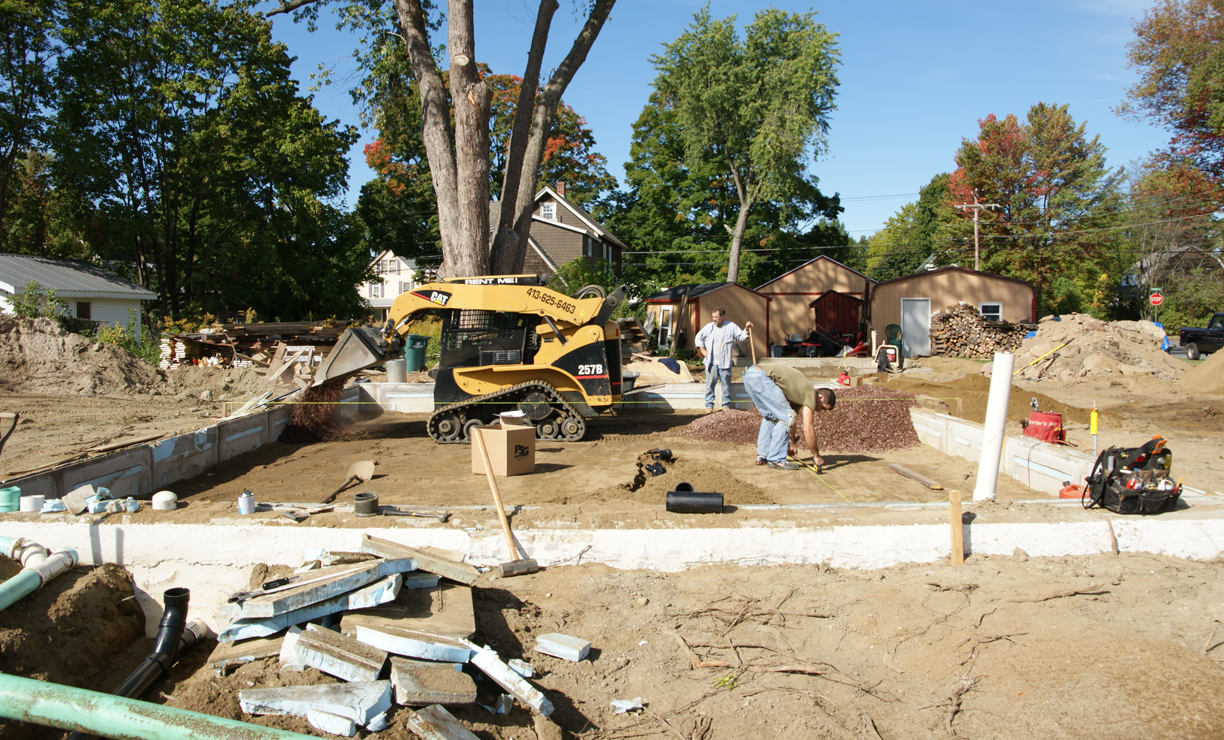
Tuesday afternoon, Wednesday, and Thursday was spent working on assembling the stem wall forms for the garage. John S. worked Wednesday morning, Thom the afternoon shift. Thursday Thom spent the whole day helping. By the end of Thursday we are 7/8ths done. Even though we are reusing forms from the house, we are being much more careful about the strength of the forms. All of the threaded rod connections now go through the frames of the forms as opposed to the plywood. A number of the forms got a second layer of plywood. In general, there are much more bolted connections.

I expect we will be ready for a pour early next week.

After the pour we strip the forms and we will finally be ready to back fill–which means no more ugly piles of dirt sitting on the property! After the back filling we pour the slabs. Since I now have an appreciation for how difficult it is to level concrete I figured I would hire out the slab finishing. So far, I have a quote for $900 labor to finish the garage and house slab.

Devin working on putting lathe on the corners of the foundation.

Devin working on putting lathe on the corners of the foundation. We pinned the lathe on by drilling through the cement coat on the existing foam, then sticking roofing nails (which have a very large head) in.

Lathe on the corner of the foundation.

Lathe on the corner of the foundation.

Spartan and Thom with hawks and trowels

Spartan and Thom with hawks and trowels. (Photo by Beth)

Spartan and Thom parging the foundation

Spartan and Thom parging the foundation. (Photo by Beth)

Contrast between old and new parging

You can see the contrast between yesterday's and today's parging. The newer parging is darker. (Photo by Beth)

The parging is done.

The parging is done. Even though it looks like we missed a lot of blue foam stripes, they actually have cement behind them.

The garage form walls at the end of Wednesday the 8th

The garage form walls at the end of Wednesday the 8th

Foundation work continues

During the past two days we made good progress thanks to the hard work of Thom B., Jason D., and John S. On Tuesday, Thom put up the outside layer of foam on the house stem wall. Meanwhile, Jason and I worked on the garage foundation.  We disassembled the footing forms, laid out the reference line for the frost wall, and began to put on the horizontal rebar. On Wednesday, John S. and Jason D. worked on setting up the garage stem wall forms while Thom and I worked on putting on the first interior layer of foam.

On Tuesday I spoke with a couple of concrete guys (Rob and Barnaby) who I might hire to finish the slab. I have discovered it isn’t that easy to get concrete flat.

Exterior stem wall foam insulation done

Here is the foundation at the close of Tuesday. The pattern from the foam’s previous life is rather nifty. My only guess as to what that life might have been was some sort of Hollywood set–perhaps to create a temple?

Thom puts the finishing touches on the last foam board of the day

Thom puts the finishing touches on the last foam board of the day. The foundation will have a total of 6″ of foam board when we are done. One layer on the outside and two on the inside of the stem wall. Total R value of 30.

Stem wall forms stripped

Yesterday and today Thom and I worked on stripping the forms for the house stem wall. We also brought over a load of recycled rigid foam insulation for the house stem wall. I bought the foam from a contractor in Greenfield for less than half the cost for new material. The contractor had ordered a whole truck load from Insulation Depot.com intending to use some for his own projects and sell the rest. It is unclear what the foam’s previous purpose was. It has a quarter inch of cement on one side as well as marks that indicate several other foam board sheets were perpendicularly attached. Although the foam boards don’t look like they are in good shape they will do the job. The cement parging makes each sheet quite heavy and will hopefully be more helpful than not. We need to parge the foam anyways to protect it. We will apply one layer to the exterior and two layers to the interior of the stem wall for a total of 6 inches (about R-30).

Spartan and Thom retrieving recycled foam boards

Our first load: 77 sheets to cover the vertical surface of the house stem wall.

The recycled foam boards stacked at our property

The recycled foam boards stacked at our property

The stem wall of the house with the forms stripped

The stem wall of the house with the forms stripped

Stemwall for house poured

We passed another landmark: the stem wall for the house has been poured. The pour didn’t go badly, but it could have been better. We ran out of concrete and had to order another cubic yard (the minimum order) at a significant monetary penalty. I should have taken the advice of the Graves Concrete sales rep to order 11 cubic yards instead of 10.5. I suspect the 10.5 would have been OK except the stem wall forms bulged at the top about a half an inch. The walls held, but one segment nearly blew out (picture below). One neat thing that we did: we sprayed recycled vegetable oil on the inside of the forms to facilitate their removal. The whole place smelled like a carnival. We got the grease from our neighbor Darryl who runs Evergreen Motors, a grease car conversion business (thanks Darryl). The standard practice is to use a petroleum based product. Another big thanks to John D. and John S. Also a special thank you to Craig C.

Spartan floating the garage footer

Spartan floating the garage footer, while the concrete truck begins to pour the stemwall.

Pouring concrete into house stem wall

Pouring concrete into house stem wall

Pouring concrete into house stemwall

Craig, and John S. directed the concrete in while John D. used the vibrator to help the concrete to settle. I Followed them up with the float--leveling the concrete to the nails that indicated the height of the pour. In order to accurately put the nails at the same height all around I used a laser level placed in the stem wall cavity. The laser level has earned a place on my favorite tools list.

Concrete into house stem wall

Pier for load point

Pier for load point. Hopefully we will be able to use one of the oak posts we milled to act as the interior post.

Top of stem wall the day after

Top of stem wall the day after. We inserted J-bolts into the top every 4' so we can anchor the house to the foundation.This particular side doesn't look very straight because it is the side with the bulging stem wall form segment.

The larger of the steps in the garage footer.

The garage footer ended up with three different heights to accomodate the ledge. This is the largest of the steps.

Stem wall bulge

This is the section of the stem wall that nearly blew out. It was inherently weaker because we it was made of two horizontal pieces of plywood.

Sewer stub in stem wall

After doing some calculations I realized that the sewer pipe exited the ground too high up. I'll have to go back and re-excavate the sewer pipe and move it down to meet the stub in the stemwall.

Keep off the grass

There hasn't been any issues with people going onto the property, but we decided it would be good insurance to put up keep off signs. The signs look really intimidating, so I decided to lighten the mood.

Stem wall forms for house – half done

We have been busy for the last week working towards and putting up the stem wall forms for the house as well as the footing forms for the garage.John S. has been very generous both with his time and materials. John had done some concrete work for another contractor some years ago. As a result he acquired a set of concrete forms that we are putting to use. Unfortunately the forms have been out in the weather for several years and require some TLC. Similarly, the threaded rod that we are using to hold the two opposing form panels together needs a fair amount of personal attention in the form of cleaning off rust and re-threading the ends.

In addition to the threaded rod, the forms are held in place with ramset nails to the footer and buttress braces to the ground.

On Monday the 16th we took off the footing forms and brought in the stem wall forms.

On Monday the 16th we took off the footing forms and brought in the stem wall forms. We also put on the two horizontal courses of rebar that run through the stem wall.

John and John hard at work cleaning up the old threaded rod.

John and John hard at work cleaning up the old threaded rod.

John and Spartan put up the first stem wall forms

John S. (hard at work) and Spartan put up the first stem wall forms. Please note: John S. works very hard... even when he is posing with shovels.

Detail of the connections between the stem wall forms

Detail of the connections between the stem wall forms. The threaded rod is inserted through a plastic sleeve (recycled plastic pipe). The sleeve allows us to remove and reuse the threaded rod as well as serve as a way to space the panels apart the required 6".

Adam working on garage footing forms

Adam working on the garage footing forms. Stepping the forms up and around the ledge is somewhat challenging. On the other hand, stabilizing the forms is really easy--just drill a short piece of rebar into the ledge.

This is how far we got by the end of Tuesday the 17th

This is how far we got by the end of Tuesday the 17th. By Wednesday we were getting in the swing of things. We wrapped around the Northwest and Southwest corners.