Fresh indoor air with plants

Remove VOC’s and improve indoor air quality with these 15 plants! Full article describing which toxins  are removed by which plant and some tips about caring for each type of plant at Mother Nature Network

  1. Aloe Vera
  2. Spider plant (Chlorophytum comosum)
  3. Gerber daisy (Gerbera jamesonii)
  4. Snake plant (Sansevieria trifasciata ‘Laurentii’)
  5. Golden pothos (Scindapsus aures)
  6. Chrysanthemum (Chrysantheium morifolium)
  7. Red-edged dracaena (Dracaena marginata)
  8. Weeping fig (Ficus benjamina)
  9. Azalea (Rhododendron simsii)
  10. English ivy (Hedera helix)
  11. Warneck dracaena (Dracaena deremensis ‘Warneckii’)
  12. Chinese evergreen (Aglaonema Crispum ‘Deborah’)
  13. Bamboo palm (Chamaedorea sefritzii)
  14. Heart leaf philodendron (Philodendron oxycardium)
  15. Peace lily (Spathiphyllum)
Advertisement

Monitoring for our PV System

WMECO gave us permission to turn on our PV system on October 23rd, so we have been creating solar power for 9 days now. Today, we hit the 100 kWh mark. That averages to 11 kWh per day, which is also our average daily usage throughout the year.

One of the great things about using a system with micro-inverters is that you can monitor each panel individually. Here is a screen shot from Enphase’s monitoring software for our system.

 PV monitoring screen shot Enlighten Enphase

The numbers on each panel represent the sum total of the past 7 days of power creation. You can see that the panels on the left are slightly lower than those on the right. These are the ones closest to our favorite silver maple tree. The “hole” in the middle of the system is where the solar hot water panels are.

Data logging! Average energy for cooking.

So I feel incredibly nerdy right now because I am very excited about the information that we are gleaning from the data loggers in place around the house. One of them, a TED 5000 installed May 2013, has been monitoring the electrical consumption for our cooking, which we do a lot of. Our stove is a standard glass-top. We now have a pretty good sample of time (mid-April through mid-October) including “canning season”. In an effort to create a more detailed picture I isolated the canning period: September 1st through October 4th.

  • Average energy consumed per day (non-canning season): 1.27kW
  • Average energy consumed per day (canning season): 3.35kW
  • Extrapolating out we can expect to use 535 kW/year cooking and canning, and, based on last year’s total electricity usage, this would be 13% of it.
  • The cost for electricity for us has been around 18.5 cents/kW so we can expect to spend about $100 per year cooking.
  • We spent an estimated $13 on energy for canning (70kW)

The TED 5000 is also monitoring our air source heat pump, which has pretty much been off since May. We used it for a total of 12 days this summer 11 of which were in June and 1 in September. A total of 35.7 kW was consumed at a cost of $6.60. Eventually I will get around to calculating how many Btu’s the heat pump is putting in (or taking out of) our home. This requires knowing how efficient the heat pump is at various outdoor temperatures, and what the outdoor temperatures are on, I would imagine, at least an hourly basis.

Speaking of the outdoor temperature brings me to more exciting news: we just purchased two more temperature loggers! Last winter I moved our one logger around the home which left us with no perspective when viewing the data. Going forward, we will be able to compare outdoor temperature to first to second floor temperature data. The outdoor logger is out of the sun about 8′ from the west side of the house and 4′ off the ground. The second floor logger is in our master bedroom.

Now that we have data logged our cooking use, I will be switch over to monitoring our refrigerator. Stay tuned!

PV Installed

It took Adam and I and the electricians 4 days to install our 18 panel 4.5 kW grid-tied solar photovoltaic system. At two full stories to the eave, a 2 foot overhang, a 12:12 pitch, and a slippery-when-wet roof, a lift was certainly in order. After deciding layout, installation began with snapping a chalk line for the first rail. Working with Adam on our house again was fun in a nostalgic sort of sense. Of course, this time we were both getting paid as Sandri employees–it isn’t every day that you get to hire yourself!

Using a lift to install rails for solar photovoltaic PV

Adam and Spartan installing the first rail.

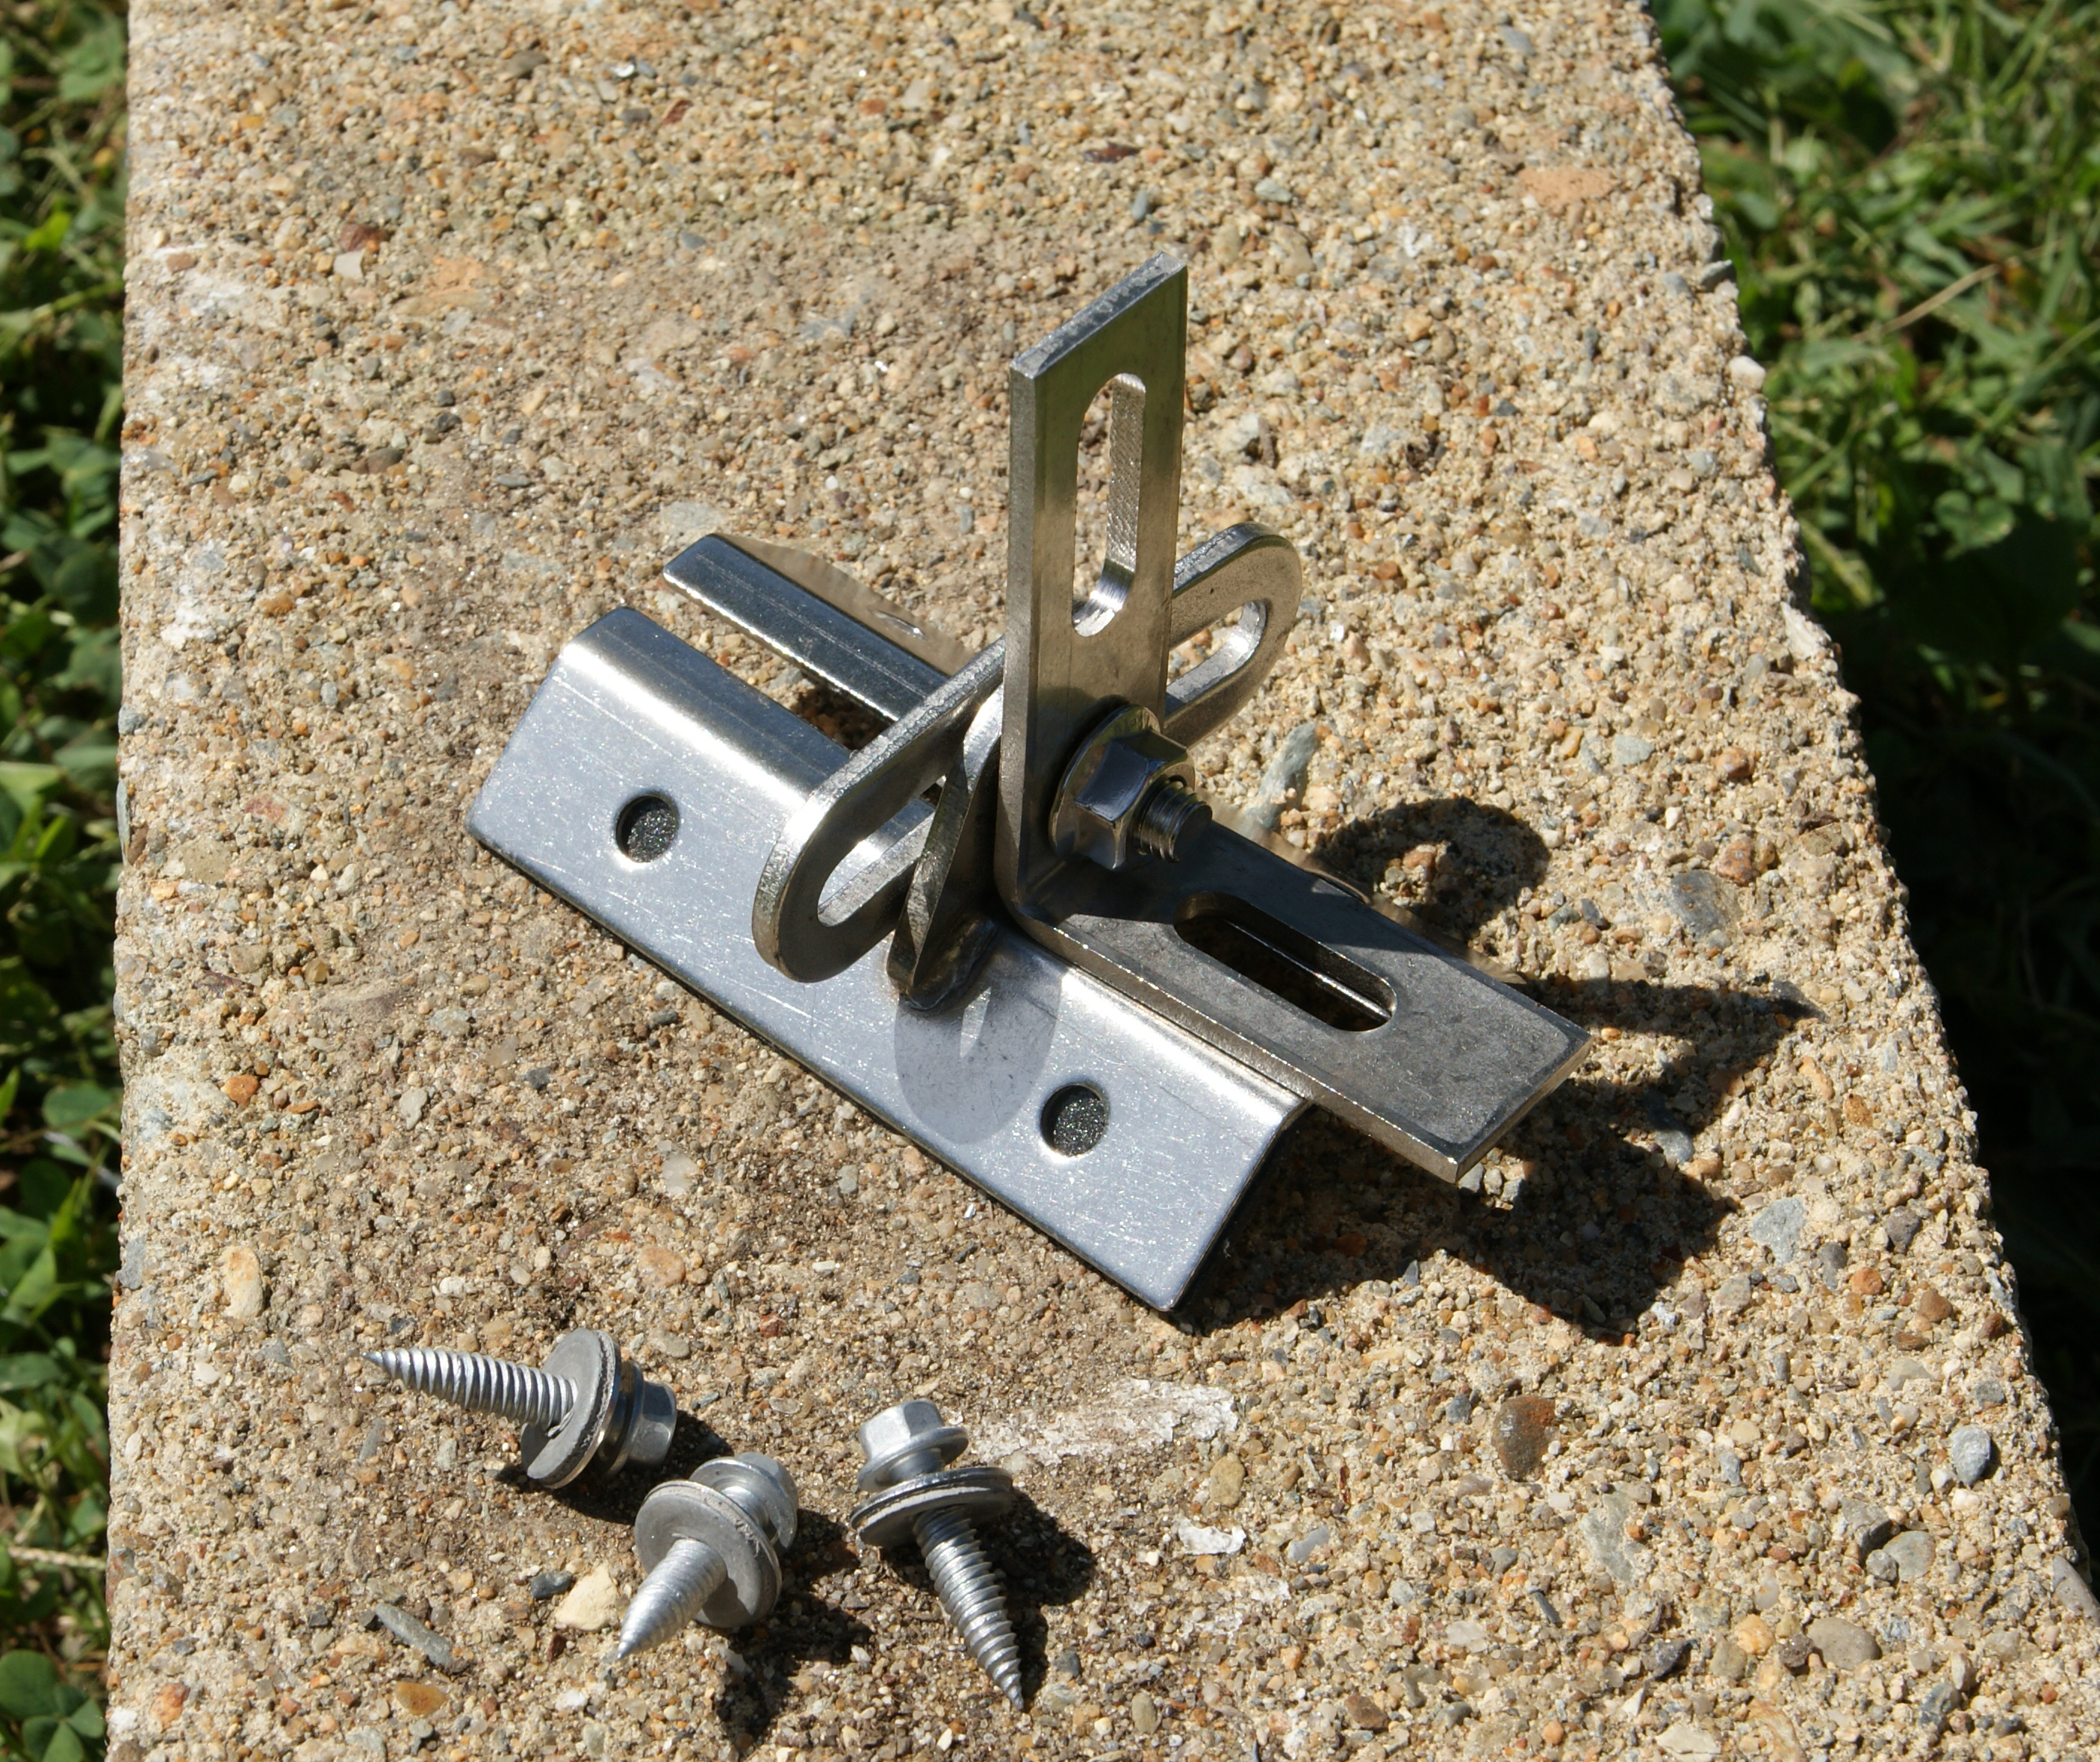
The rails are attached to the roof using S5!’s new Protea clip. It is specifically designed to adapt to any metal roof with trapezoidal ribs. The fantastic thing is that they don’t need to be sunk into the trusses/rafters. They simply attach to the metal rib using four gasketed sheet metal screws. These clips were a huge boon to us because our house has cathedral ceilings across the entire roof; no access to the trusses. The manufacturer claims the clips can take 1000# uplift. When we walked and moved around on the rails, Adam and I both felt that they were more stable than rails mounted with standard Eco-feet with L brackets.

S5! Protea clip solar bracket metal roof ribbed rib

The S5! Protea clip has a butyl adhesive strip underneath the clip that seals it to the sides of the rib. No caulk required! We did encounter a serious problem though. We use Ironridge’s XRS rail which asks for a 3/8″ bolt with a 9/16″ head to connect to the clip. Unfortunately, the vertical slot in the clip is 5/16″. We found out the hard way that you can’t get a 5/16″ bolt with a 9/16″ head. We solved the problem by having a local fabricator mill out the slot to 3/8″. It only added less than $2/clip. I am not sure if S5! would have had a solution for us because they did not return our phone calls or emails in a timely fashion. Schletter makes a comparable clip as well and if we do this again we will be looking into it.

Solar panels produce DC electricity so you need an inverter/s to convert to AC. Although somewhat more expensive than a single inverter, we chose to use micro-inverters. This means that each panel has a dedicated inverter beneath it. This allows the system to overcome some of the problems associated with shading. In a typical single inverter system, if any panel is shaded, all of the other panels can only produce as much as the shaded one. Since we have a large silver maple tree right next to our house micro-inverters were essentially a necessity. At present time, there are only a few microinverters on the market: PowerOne, Renesola, and Enphase. We went with Enphase in large part since they have been on the market the longest. When you choose a micro-inverter you are also signing up for the same company’s monitoring system. You can log into your system via a web portal and see statistics for each panel as well as the entire system. If any panels are not functioning you will know.

Sparta installing solar PV electric photovoltaic on roof

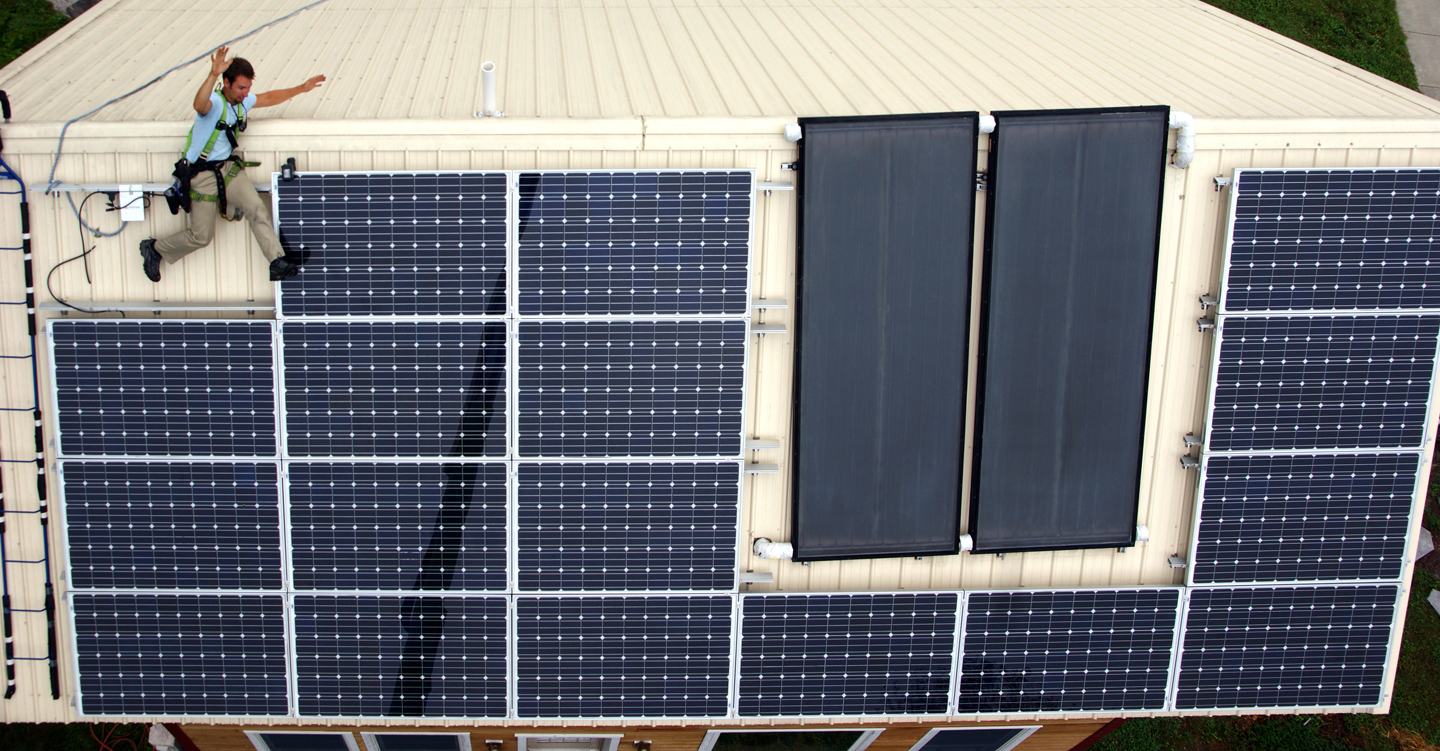
Adam took this awesome shot from the lift. I love how it makes everything look 2 dimensional. It also reminds me of old video games like Mario Brothers; in this case the rails are the different levels that I could jump to. The units attached to the rails are the micro-inverters. The tilt for the solar hot water drain-back system is quite visible from this angle. Not all of the clips for the remaining rails have been installed. Photo Adam Heintz

Before we put on the panels I took a final set of solar access photographs using our Solmetric Suneye camera that uses a fish eye lens to photograph the sky. After orienting the camera towards south and leveling it you take a photograph that is instantly analyzed by the on-board software. Our annual solar access average is at least 85%. I say at least because we removed one final branch using the lift after the shots were taken.

Suneye Solmetric solar access compilation

Left to right is East to West on the roof.

I wanted to use US made solar panels so we went with American Choice panels sold by Renewable Sales. The panels are in fact re-branded 1Soltech panels made in Texas. Each panel is rated to create 250 watts/hour. The rating system baseline is actually somewhat worse than the amount of sun we get in Greenfield Massachusetts so, shading aside, one can expect to see more than 250 watts per panel under ideal conditions.

solar-pv-on-white-metal-roof-with-solar-hot-water

Our soon to be net-plus home.

As solar installers, Adam and I often get asked if we install systems with battery back ups. Unfortunately, battery technology/costs are not at a place where it is economical. However, there are a couple of promising workarounds coming on the market that, when the grid is down, allow electricity from the panels to be used in real time without batteries. One of them is an inverter by SMA that provides up to 1500 watts on a dedicated switched outlet.

Make the leap and go solar!

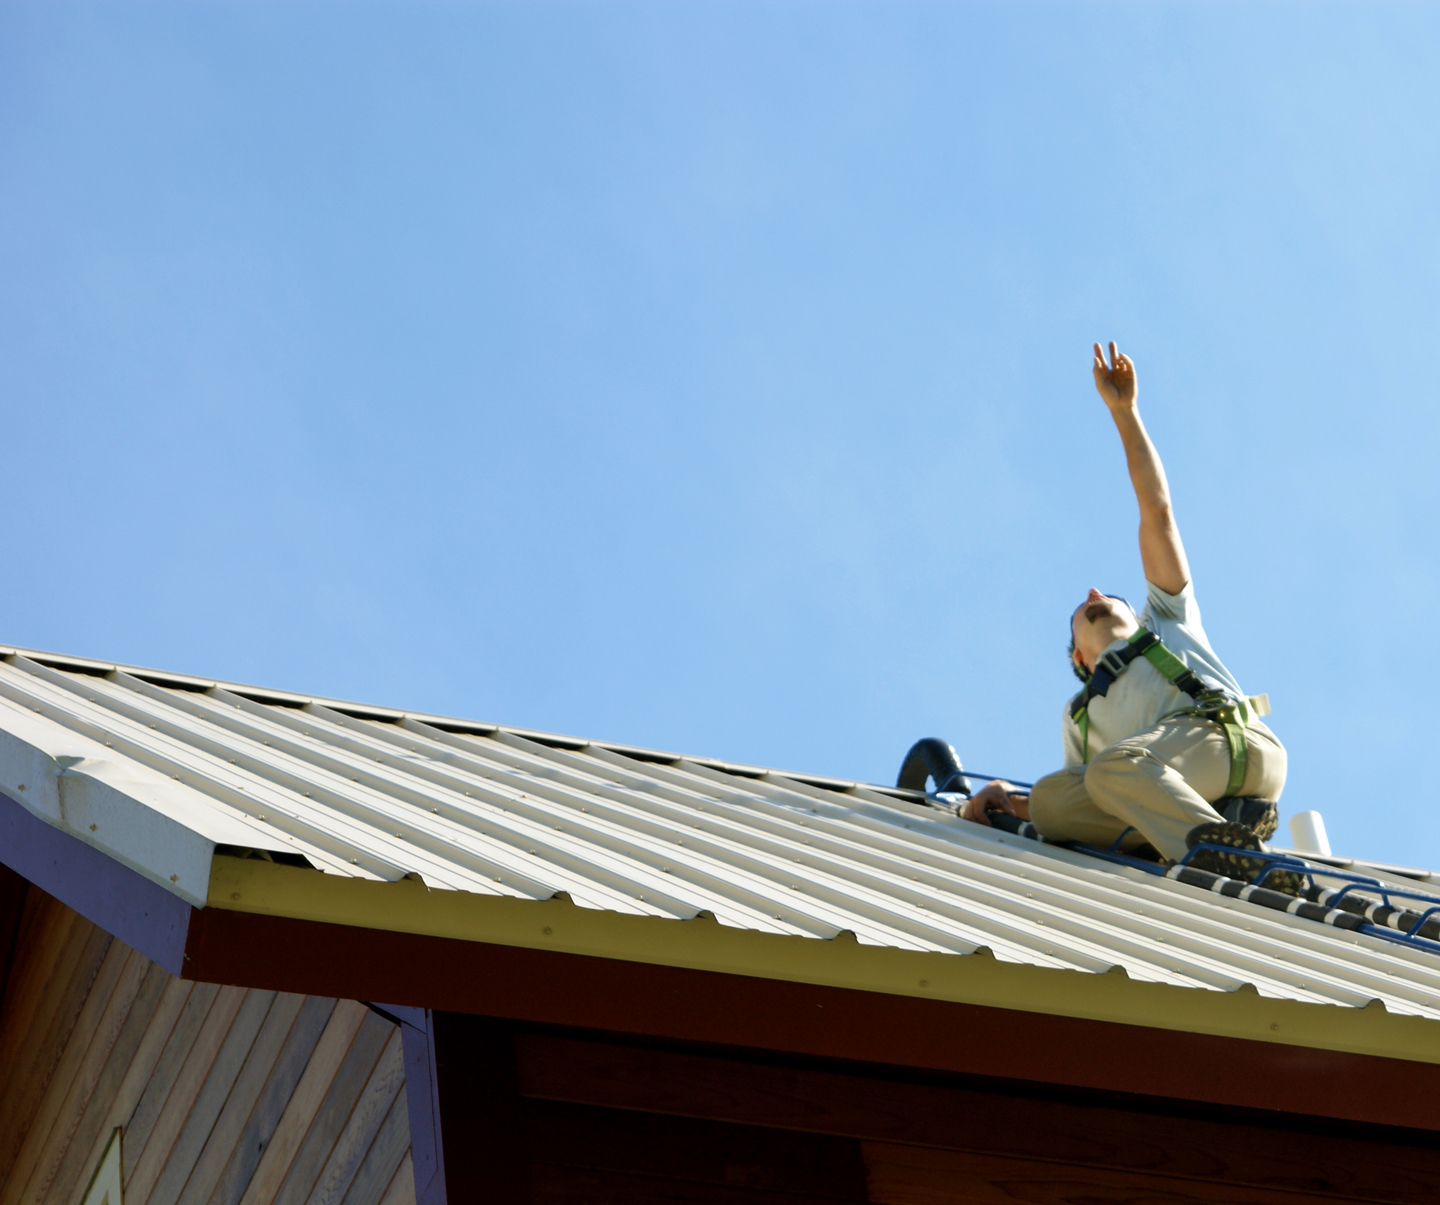
Make the leap and go solar! Photo Adam Heintz

Pruning for PV

Any day now we will begin installation of a 4.5 kW photovoltaic solar system on our roof with my company Sandri Energy. In order to get more sun for the system (and meet minimum state rebate requirements) we pruned our silver maple tree. To do the work we had John D. and his friend Gordon return to help us out. Spartan was up on the roof directing which branches to cut John was in the tree and Gordon worked on the ground. We cut 3 medium sized limbs. The amount of sun hitting the westerly part of the roof went from 69% to 81%. Overall, it is difficult to notice any difference to the canopy.

Pruning a tree ropes climbing

I have never been to a ticker tape parade with confetti, but I imagine this is what it is like.

I have never been to a ticker tape parade with confetti, but I imagine this is what it is like.

Limb falling from high up in tree

Two things make me queasy: surgery and its associated “blood and guts”, and watching John high up in the tree do his thing.

loading up a trailer with tree branches

Thank you to Thom for lending us his trailer.

Pointing to which limb to take down.

Pointing to which limb to take down.

John Duda and his friend Gordon make a great team! Thank you both!

How to grow fresh air

I recently watched this TED talk entitled How to Grow Fresh Air. It has significant implications for our existing buildings that have poor air quality and for our new buildings that are being built to super-tight standards. If the power goes out and we are relying on our HRV’s and our ERV’s to bring us our healthy air Kamal Meattle says that we can rely on these three house plants to sustain us:

  1. Areca Palm  (Chrysalidocarpus lutescens) – Turns CO2 into O2 during the daytime
  2. Mother-in-law’s tongue (Sansevieria trifasciata) – Turns CO2 into O2 during the night time

  3. Money plant  (Epipremnum aureum) Removes – VOC’s


First floor photographs

Some photographs of the first floor:

View if one enters from the Vernon Street door.

View if one enters from the Vernon Street door.

Looking right upon entering through the Vernon Street door one looks up the stair well. The door facing the camera is the mechanical room, the door on the left is the first floor bath.

Looking right upon entering through the Vernon Street door one looks up the stair well. The door facing the camera is the mechanical room, the door on the left is the first floor bath.

granite scrap floor open floor plan

View from the living area into the dining area. The over-sized chase for the duct-work and solar piping serves to divide the spaces. On the far wall above the window is the heat pump.

open floor plan

Looking from the dining area into the living room.

Kitchen

Our kitchen still needs a fair bit of work. The half wall needs a bar top, the far counter is plywood, and there are some cabinets that need to be put in.

Mudroom with custom coat hooks

Last summer I built the coat rack using live edge cherry from one of our trees and hooks from our local black smith Pierce Street Ironworks. The door to the cold storage room still needs to be constructed.

First Annual Energy Usage Report

We have now been living in our home for over one year. Our home is completely run by electricity provided by WMECO, so this report is pretty easy.

Total energy usage from 2-10-2012 through 2-12-2013: 4197 kWh
Total cost: $701.96
Average temperature as reported by WMECO: 50 dgr F
Heating Degree Days
base 63F: 5564

Notes:
2012 was a leap year.
For whatever reason WMECO is not consistent with when they bill out, causing the annual usage to be represented by 368 days.
Three occupants for the entire period.
Due to line loss, for every one watt consumed three watts need to be generated

Other data points and related anecdotes:

  • For the winter, we have been happy with the heat pump set to 63 during the day and 59 at night.
  • For some reason the heat pump will heat the house past what it is set to. So, assuming no solar gain, the house is usually a couple of degrees warmer than the heat pump setting–and the heat pump will come on before the temperature has fallen. The only explanation I have for this is either the heat pump infrared thermometer is reading window temperatures, or it is inaccurate. The HRV thermometer appears to be accurate.
  • The house uses the first floor slab as a heat sink. During summer it keeps the home cool. Only after the heat wave, where the temperature was in the 90’s for 3 days straight, did I notice that the slab was warm.
  • A couple of readings from the HRV (heat recovery ventilator) (dgrs F)
    • 1/7/13 was sunny and in the low 40’s; the indoor temperature rose to 71. The night was in the upper teens, the heat was off, and we only dropped to 64 by 7:00am
    • 1/3/13 Overnight was in the lower single digits, the heat pump was set to 63 and the indoor temperature was 62.
  • The average humidity in the home so far this winter is around 40%

For comparison:
“In 2010, the average annual electricity consumption for a U.S. residential utility customer was 11,496 kWh […]. Tennessee had the highest annual consumption at 16,716 kWh and Maine the lowest at 6,252 kWh.” Source: http://www.eia.gov
Only 26% of US homes use electricity for heat. Source: http://visualeconomics.creditloan.com

My goal for next year is to be able to break down the usage into heating, cooling, cooking, refrigeration, ventilation, and hot water. This will require the installation of kilowatt meters by an electrician. The plug-in kind can only monitor the refrigeration and ventilation.

Cost Breakdown of Construction

The total cost of construction from clearing land until we were able to move in was about $161,100.
The final cost of completion will probably be closer to $165,000 as there are many small things that still need to be done, (trim, painting the third floor room, kitchen counter top, closet doors etc.). Also, one must keep in mind that my labor was free as well as the help of many friends and family. We received $15,100 in rebates and tax incentives bringing the total cost down to $146,000. Our 1500 square foot (S.F.) house cost $97.30/SF to build.

Cost breakdown by type of expenditure

Materials $90,245.09
Labor $60,655.35
Permits, fees, engineering $4,490.70
New tools $4,336.65
Equipment and tool rental $2,973.18
Fuel $1,559.44
Food $434.70
Trash, disposal costs $384.61
Other $290.36

Cost breakdown by construction area

Doors, windows, interior window trim, and extension jambs $18,787.55
Framing $17,840.95
Insulation (labor & material, includes foundation insulation) $15,946.51
Foundation for home and garage $15,248.53
Siding, soffit, exterior trim $13,965.51
Sitework $12,460.50
Plumbing (labor and material) $10,218.69
Other $6,933.52
Electrical $6,868.67
Roof (Material and labor both sheathing and metal) $4,801.80
Porch $4,010.37
Drywall $3,255.16
HRV & Ductwork (material only, no labor cost) $2,793.22
Paint (labor and material) $2,738.45
Heat pump (material and labor) $2,600.00
Floors $1,901.39
Stairs $1,643.28
Driveway $1,475.00
Tiling bathroom and kitchen counter $1,353.52
Create lumber from trees from site $740.36
Solar hot water (after rebates and incentives) $269.45